If you already know the difference a Malossi variator makes, you might be eager to find out how many types of Malossi variators exist, and how to mount a variator properly to truly feel how responsive your engine can be. It is precisely the variator that transforms every twist of the throttle into pure acceleration, but it must be mounted taking the necessary care to ensure everything “runs smoothly.” To help you to mount this component, we have created this quick guide, but there is one golden rule that starts it all: always follow the instructions in your kit and the specific notes for your part number precisely. If your code is in the index, refer to those indications; if not, follow the general instructions.
Things to do or know before attempting to mount a variator
Are you in the garage with your scooter and don’t know where to begin? Start with your workbench and prepare it to have everything you need within reach, more specifically:
- Appropriate wrenches and sockets
- Torque wrench
- Degreaser for the outer casing
- Clean cloths
- Vehicle manual for tightening torques
- Specific tools for locking the fixed half-pulley/clutch bell
If your kit requires it, you might need a lubricant, such as our Malossi 7.1 MHR Grease
At this point, to mount a variator like a true pro, thoroughly clean the outside of the transmission casing: working cleanly prevents errors and false impressions during reassembly.

1. Remove the original variator
The number one stress point when mounting a variator is losing small parts – but if you follow our instructions and keep your workspace tidy, you won’t have to worry.
Start by removing the transmission side casing. Keep track of all the bolts and screws; make sure not to lose any of them, and note down where each screw came from. Next, unscrew the variator nut on the crankshaft and gently slide the entire original assembly off. If your kit comes with a torque spring, you’ll also need to remove the rear clutch assembly. Watch out for the spring preload! Replace the spring, then put the unit back together. While you have things open, take a moment to check the belt: if it’s not in great shape, it’s worth replacing it now – perhaps with a Malossi K Belt.
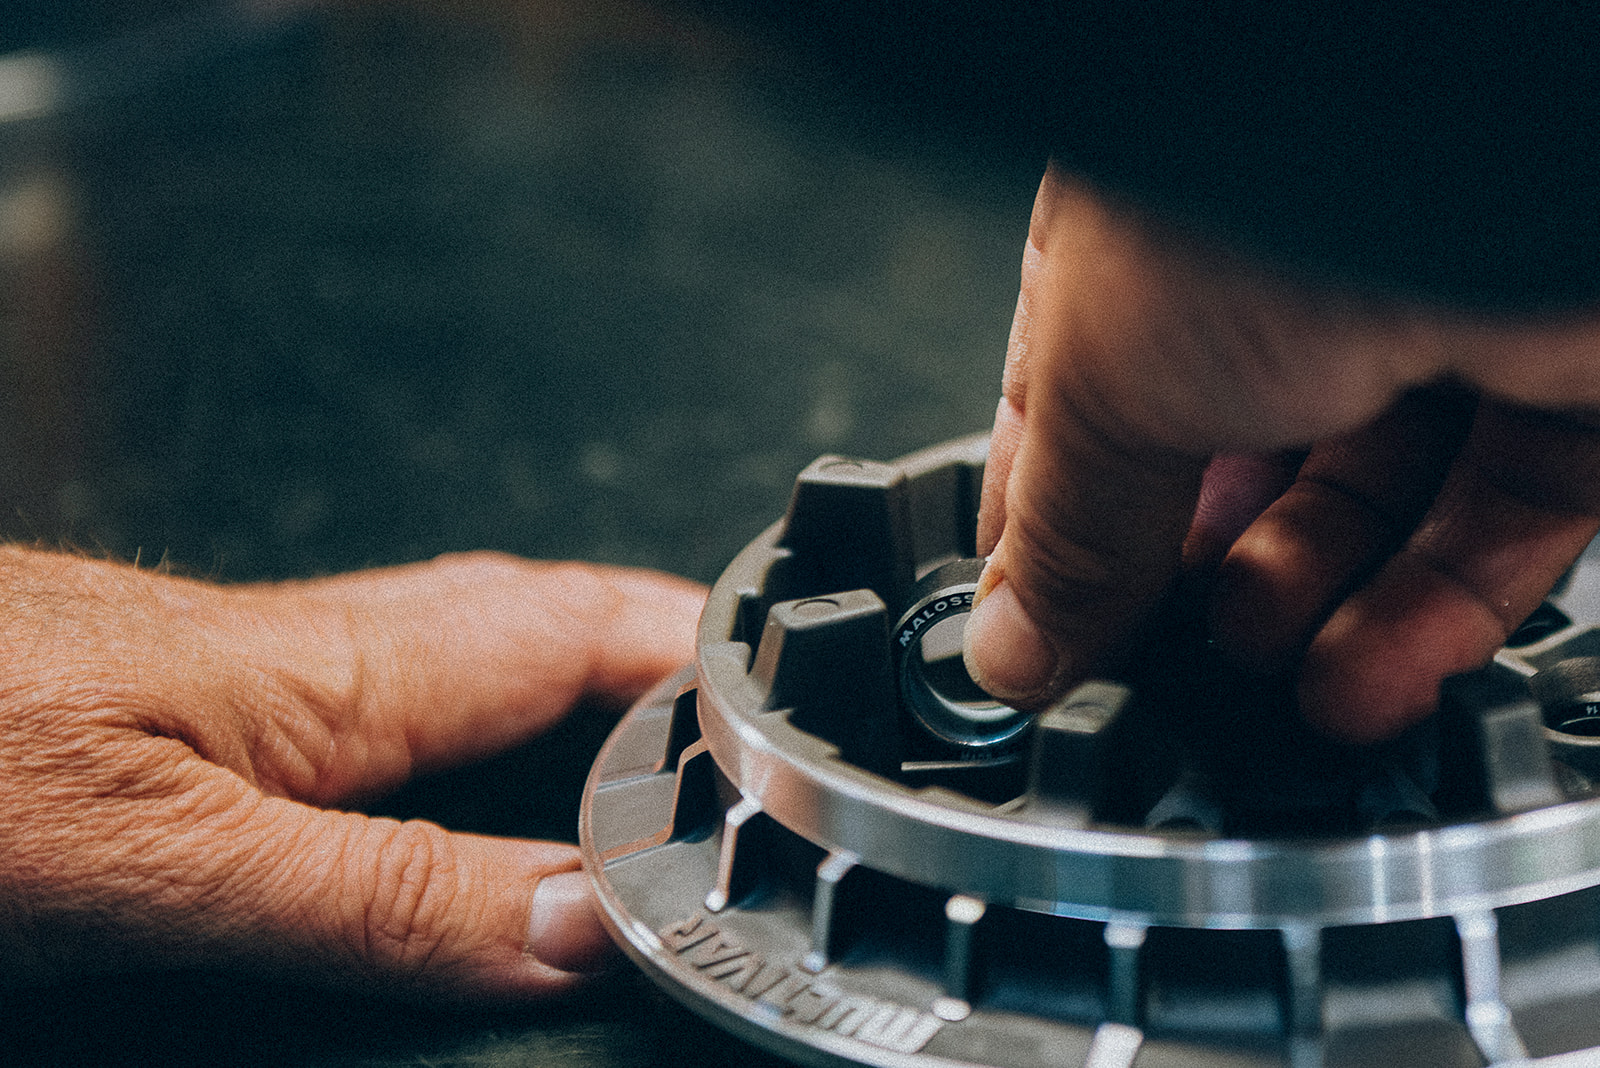
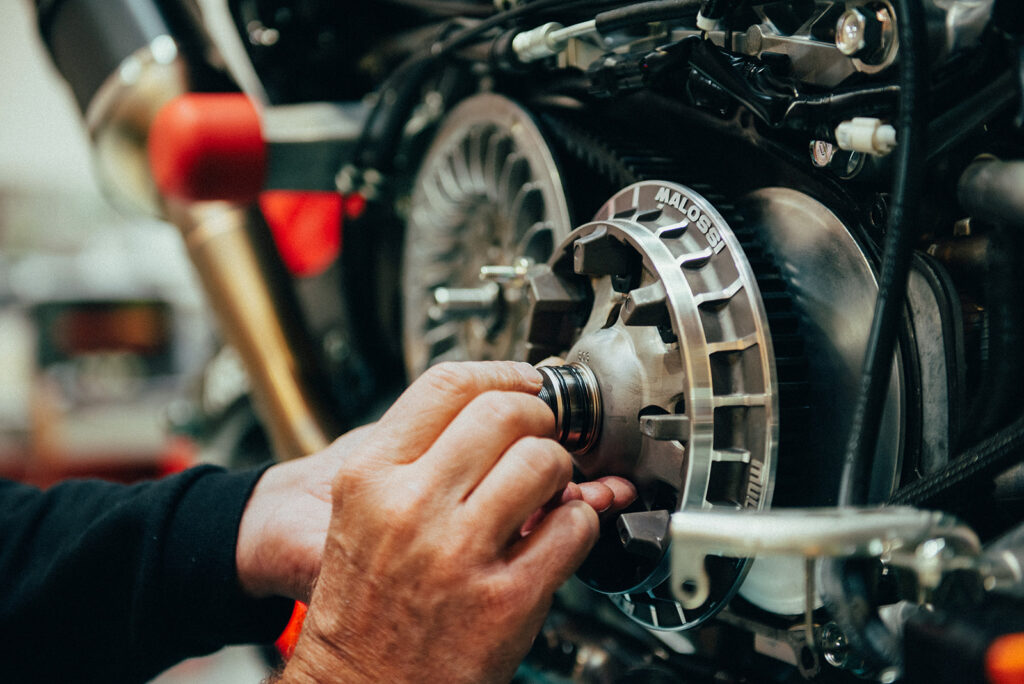
2. Mounting the Malossi variator
This is the part where precision is critical.
First, mount the sliders onto the roller guide plate and position the rollers into the tracks of the movable half-pulley. Then, close with the guide plate complete with the sliders. Slide any required spacers onto the crankshaft, connect the hub into the half-pulley, and carefully thread the entire assembly onto the shaft, making sure the rollers don’t slip out of their guides. Push everything firmly into place, position the belt over the hub, and fit the fixed half-pulley (either the original or the one included in the kit), using appropriate tools, followed by the fan and any washers needed. Screw the nut on by hand and make sure to relax the belt in the centre so it isn’t squeezed between the pulleys. Then, tighten it to the torque specified by the manufacturer.
Some kits require the lubrication of specific areas of the hub/bushing. If yours does, make sure you never use degreasers on sintered bushings, and remember that for lubricated versions, the lubricating grease should be replaced every 10,000 km.
3. Calibration: rollers and spring – finding your feel
How do you mount a variator to give your ride the specific character you’re looking for? Keep in mind that heavier rollers will lower the RPM range (giving you more low-end pull), while lighter ones will raise it (providing more top-end boost). You can even alternate between two weights – inserting a lighter one followed by a heavier one, and so on – to fine-tune your power curve.
You can rest assured knowing that Malossi rollers have no mandatory installation direction: they work correctly no matter how you place them.The torque spring, on the other hand, balances the load on the belt against the centrifugal force of the rollers. If the belt slips, increase the spring tension; if you tighten it up too much, you risk wasting power and wearing out the belt and pulleys prematurely. Many kits require the compulsory use of the supplied spring, so install it, and your scooter will turn every launch into a burst of adrenaline.
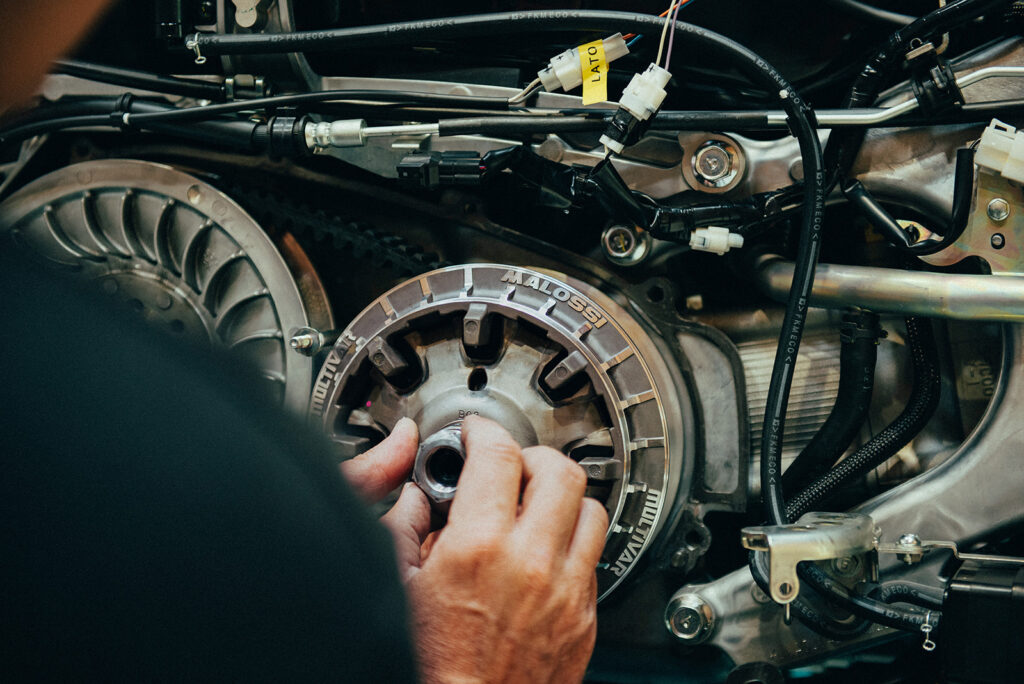
4. Final checks
Before buttoning everything up, carry out one final check to make absolutely sure you’ve installed the variator correctly and safely:
1. Check that the belt runs freely and that the variator nut is securely locking all components in place.
2. Clean off any traces of grease from contact surfaces, and take a quick look at the rollers, sliders, and oil seals – they must all be perfect.
Now it’s time to close the casing and fire up the scooter. Listen to how it runs: what does it tell you? If you’ve followed our instructions, it will most likely tell you that you nailed it, so you can head out for a road test. Accelerate gradually, without pushing it too hard during the first few kilometres. Soon after, you’ll feel the difference and you’ll naturally think that your ride is finally performing exactly how you want it to, or that you want to make some more adjustments.
Maintenance: a few minutes, huge differences
So, that’s how you mount a variator, but the job isn’t finished yet – you still need to perform regular maintenance. Keep an eye on your transmission, just like you would monitor your tyre pressure before hitting the track. The belt should be checked every 5,000 km, and if you notice any signs of wear and tear, cracking, or if the width has dropped below the specified limits, it’s time to replace it. During routine maintenance, also check the conditions of the variator components: the rollers, the roller tracks, the hub, the bushing, and the slider shoes all need to be in perfect shape. If you have a lubricated version, make sure the hub and bushing are always well-greased. This is the only way you’ll continue to enjoy the same smoothness and powerful acceleration you felt on day one.
Common errors to avoid when installing a variator
Anyone who has looked up how to mount a variator finds out it’s not difficult, but it only takes a second to mess things up. Plus, certain mistakes are noticeable and costly from the very first twist of the throttle. For example:
- Did you tighten the nut and got the belt caught in the middle? Congratulations, you just invented the “hiccoughing” variator. Open everything up and start from scratch.
- Did you use degreaser on the bushings? Bad, that’s very bad. Those components should only be greased, not scented with lemon or washed with washing-up liquid.
- Did you skip reading the specific notes for your kit? You know we’re rebels too, but certain rules must be followed. Spacers, springs, index information: if specific instructions are provided, there’s a reason for it (and you don’t want to discover it the hard way on your scooter).
Now, go and have fun
At Malossi, we design our components to maximise your enjoyment when you’re riding your scooter, but also while you’re in your garage. That’s why, by leveraging our experience, we engineer our variators – like we do with all our products – to be easy to mount on the vehicles they are made for. Since the garage should be the temple of your passion, not a place of frustration, and this is exactly where we want your fun to begin. Once the job is done and dusted, you’ll know right away if you’ve mounted and calibrated everything properly: you’ll feel fuller acceleration, smoother shifting, and the engine humming happily even at high RPMs.
With our variators, you’ll turn every launch into a small thrill of satisfaction that leaves the others behind when the lights turn green. Now that you know exactly how to mount your variator, all you have to do is find yours at malossistore.com and head towards your garage.